Chocolate Caramel Cake
When my dad asked for a chocolate cake for his birthday this year, I was just as surprised as when he asked for a Caramel Cheesecake for Father's Day. And then when he remembered that cheesecake, he said that he didn't just want a chocolate cake, but a chocolate caramel cake. My dad has always been a fan of Snickers and Twix bars, so I guess I should not have been so surprised by his choice. If anything, I should be glad that he's trying more flavours. I knew I definitely wasn't going to sway from Nigella's recipe for chocolate cake, which is in my post, 'I Reject the Devil' Food Cake. But what to do for icing? Chocolate and caramel are both sweet, so the thought of butter icing made my teeth weep. I didn't want the cake to be sickly and I know that my dad is likely to scrape off any icing. So during my research, I saw a cake with chocolate sponges and double cream for a filling and top - perfect, the cream will cut through the sweetness. I would then adorn it with chopped chocolate caramel bars - beautiful. With most cakes I bake for the first time, I tend to make mistakes and this one was no exception. You will probably notice in the pictures that the caramel is overflowing from the insides of the cake. Well, I did add the amount I intended to but didn't take into consideration the amount melted. I noticed as I was adding it that it was too much, but because I hate waste, I just poured the whole bowl over. Next time I will be halving the amount so that the caramel does ooze but in a more graceful manner. The cake still tasted glorious, a lot lighter than I thought and not too sweet. I was afraid of the sweetness and cut tiny slices, but my dad asked for more. Decadent, delicious and delightful.

The process of making this cake is exactly the same as 'I Reject the Devil' Food Cake. I pre-heated the oven to 180 degrees and buttered and lined two sandwich tins with grease-proof paper.


Back to the butter, I added in a couple of teaspoons of vanilla extract and cracked in an egg. When the egg was properly mixed in, I added in a few tablespoons of the flour mix and let that mix in properly. I then cracked in the last egg, put in a few more tablespoons of the flour and when that was all mixed in, I dumped in the rest of the flour mix.


Then in a bowl, I sifted in cocoa powder, added in dark muscovado sugar and poured in boiling hot water. This was whisked together and left to the side.

Then in a large bowl, I creamed the butter and sugar together until it was light.

Then in another separate bowl, I mixed together the plain flour, baking powder and bicarb (I did this while the butter and sugar were creaming).

That was the vanilla sponge batter done - but I had to turn this into a chocolate sponge batter.


I left my cakes to cool completely so that they would be ready for the double cream. If you don't let your cakes cool down, the cream and chocolate will just melt everywhere and slide around like a dog trying to ice skate.


I sat the top layer of cake on top of this (yes, more caramel escaped from the sides) and spread the remaining caramel cream on top of that.


So I poured the hot chocolate into the batter and mixed this in gently.

I also used a spatula to scrape the sides and make sure everything was mixed in properly, we don't want a marbled cake on our hands - unless you want one of course.

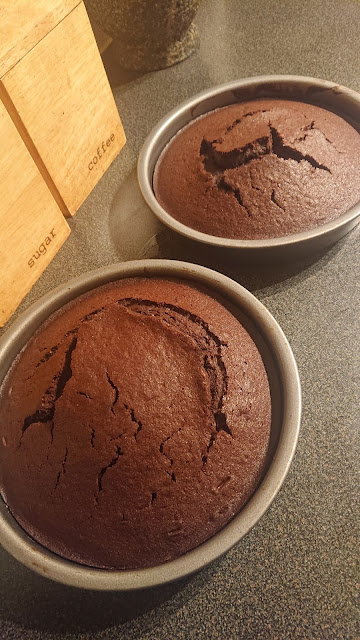
This was poured into the prepared sandwich tins and baked for 30 minutes.

After 30 minutes, I checked to see if they were ready by sticking a toothpick into their centres. They came out clean, so I knew they were ready. The kitchen will also start to be filled with an intense chocolatey smell, which is also an indicator that they are ready. I saw on Bake Off that you can listen to your cakes to know if they are ready, but I wasn't prepared to burn my ear.

When the cakes were cool, I poured double cream into a bowl with two tablespoons of caramel. I used Lotus Biscoff spread which possesses the same flavour as the caramelised biscuits. But if you find caramel sauce, it will still work.

These were whisked together until the cream thickened to form soft peaks. You want it thick, but still soft enough to slightly flow, like Greek yoghurt. I spread half of this over the bottom layer of the cake.

I then melted three heaped tablespoons of the caramel spread in the microwave for 30 seconds. Next time I will be melting one to one and a half tablespoons of this because it was just too much! And I still spooned the whole thing on top of the layer of cream - looks fabulous, doesn't it...


Then taking some milk chocolate caramel bars, I roughly chopped them and placed them around the edges of the cake, very simple décor.

I loved this cake, it tasted like a caramel chocolate digestive in cake form. Next time I make this, it'll have to be a three layer cake because it's everything you dream of in a cake: moist, light and tasty. My mum who doesn't even like chocolate cake enjoyed this and couldn't wait to have a slice the next day with tea (and she did). And to think that I was worried about mixing the cream with the caramel because it would add even more sweetness, but the cream does its job and mutes the harsh sweetness of the caramel spread. This recipe is so easy with fantastic results, and just as I have, you can play around with it, maybe try a coffee filling and top, salted caramel, or if you like it simple, vanilla. Also, make sure you use the best quality cocoa powder as Nigella specifies, otherwise, you will find the chocolate flavour evaporate in the oven before you get a chance to eat it.

Serves: 8-10 people
Prep Time: 30 minutes
Baking Time: 30 minutes
Ingredients:
For the Cake:
- 50g Cocoa Powder, sifted
- 100g Dark Muscovado Sugar
- 250ml Boiling Water
- 125g Unsalted Butter, softened
- 150g Caster Sugar
- 225g Plain Flour
- 1/2tsp Baking Powder
- 1/2tsp Bicarbonate of Soda
- 2tsp Vanilla Extract
- 2 Eggs
For the Cream Filling and Topping:
- 300ml Double Cream
- 2tbsp Caramel (I used Lotus Biscoff spread)
For Filling:
- 1.5tbsp Caramel, melted
For Topping:
- 100g Chocolate Caramel Bar, roughly chopped
Method:
- Preheat the oven to 180 degrees and butter and line two sandwich tins with grease-proof paper.
- In a medium-sized bowl, put in the cocoa powder, muscovado sugar and boiling water and whisk together. Put this to the side while you get on with the cake batter
- In a large bowl, cream the butter and caster sugar until pale and light in texture. This can be done in a standalone mixer, with an electric hand whisk, or by hand with a wooden spoon.
- In another separate medium-sized bowl, place in the flour, baking powder and bicarb and mix together.
- In the large creamed bowl, add the vanilla extract. Then, while mixing, crack in an egg, followed by a few tablespoons of the flour mixture making sure it's fully mixed before adding in the last egg. Add the rest of the flour mixture, mixing very well until it's fully incorporated.
- Take your hot chocolate mix and pour this into the cake batter and fold this in until the chocolate is completely mixed in.
- Divide the batter equally into your sandwich tins and bake for 30 minutes. Check the cakes are ready with a skewer or toothpick, it should come out clean. When the cakes are ready, leave them to completely cool in the tin or wire rack.
- When you're ready to serve, place the bottom layer of cake on a plate or stand. Whisk the double cream and caramel together until soft peaks form and spread half of this onto the bottom layer of cake.
- Melt one and a half tablespoons of caramel (if it needs melting) until it's runny. 15-30 seconds in the microwave should do this. Then drizzle the melted caramel over the bottom layer of cake with the cream on top.
- Sit the final layer of cake on top and spread over the remaining caramel cream. Roughly chop the chocolate caramel bars and place them on the edges of the cake or in whatever design you would like. Cut into slices and serve.


Comments
Post a Comment